
Hillside Construction in Los Angeles: Foundations, Drainage, Costs, and How the Coordination Works
What hillside sites actually cost to build, why the premium exists, and how the regulatory framework, drainage requirements, and construction logistics drive every decision from feasibility through completion.
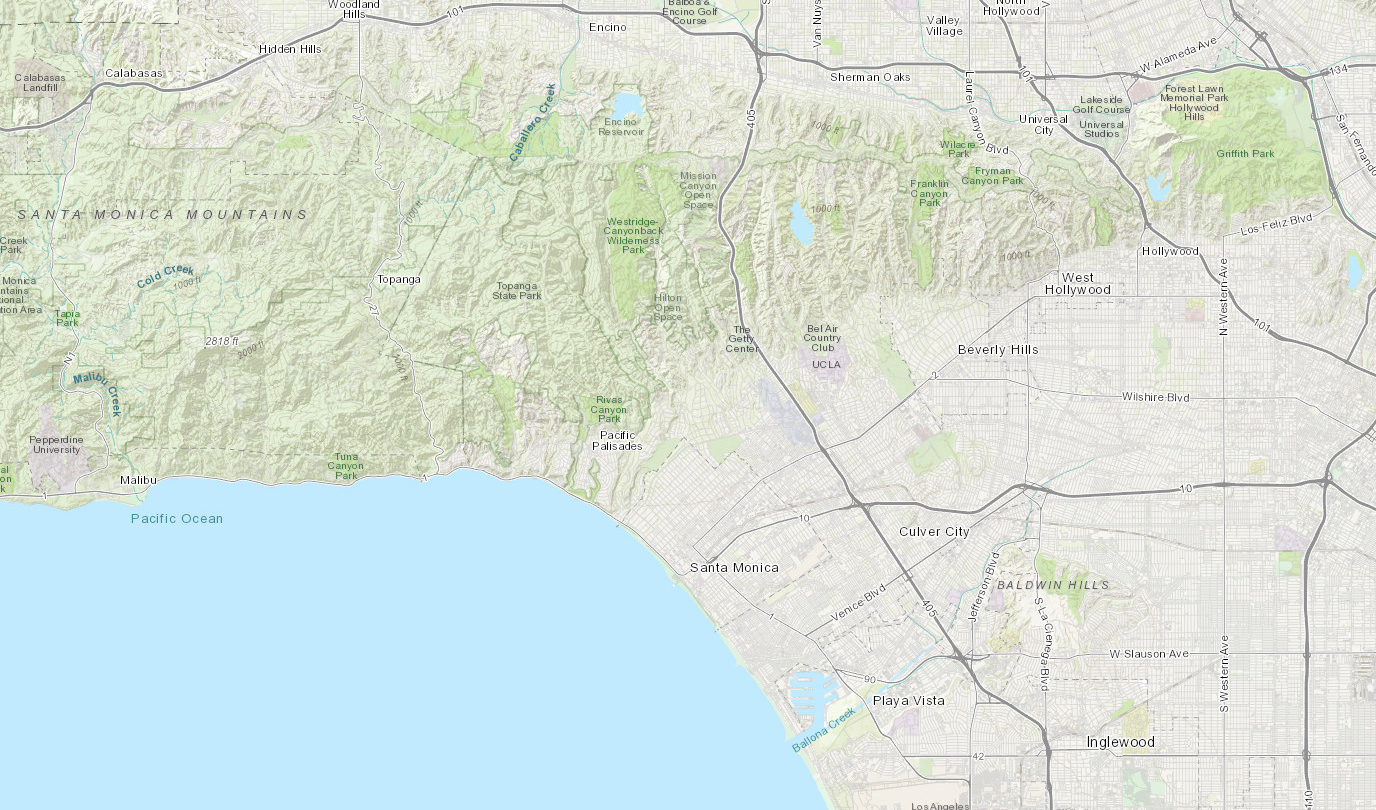
A property owner in Malibu purchased a hillside lot above PCH with a 35% average slope, budgeted $4.5M for a 4,200 SF home based on per-square-foot costs from custom builds on the Westside, and learned during preconstruction that the site required 40-foot caissons to bedrock, a soldier pile shoring system to protect the downhill neighbor, 3,500 cubic yards of export on a road with no staging area and a 45-minute round trip to the nearest disposal site, and a permitting process involving both the City of Malibu and the California Coastal Commission that took 16 months before the first grading permit was issued. The final construction cost was $7.2M. The house itself (framing, systems, finishes) cost roughly the same as it would have on a flat lot anywhere in LA. The $2.7M premium was entirely below the first floor.
That outcome is not unusual. It is the standard cost profile of hillside construction in Los Angeles when the site conditions, regulatory framework, and construction logistics are not evaluated before the budget is set. Most of the premium is predictable, but only if it is identified during feasibility rather than discovered during construction.
This page covers what hillside construction actually involves in Los Angeles: the site conditions that drive cost and complexity, the BHO and HCR regulatory framework, foundation and grading operations, drainage and water management, slope stability, retaining walls, and the construction management coordination that ties it all together. It is written from a construction management perspective, focused on how these projects actually work and what they actually cost.
Last reviewed: July 2026
Hillside properties move. Not all movement is catastrophic, but all movement has a cause, and the homeowner usually discovers it when something changes: a crack appears in a retaining wall, a floor slopes where it did not before, a door sticks, or a neighbor's grading work has redirected water onto the property. The immediate question is whether the house is safe. The longer question, and the one that actually determines cost, is what is driving the movement and what it will take to resolve it. On hillside sites in Los Angeles, that answer almost always involves geotechnical investigation, structural engineering, drainage analysis, and often a grading or shoring permit before any physical construction can begin. These are not independent problems that happen to coexist. They are interconnected systems, and the sequencing of the response determines whether the solution holds.
Understanding Hillside Sites
Before discussing what you build on a hillside, you need to understand what you're building on. The site conditions (slope, soil, groundwater, fill history) determine the foundation system, the grading strategy, the equipment plan, and ultimately the cost. On a flat lot, site conditions are usually predictable, but on a hillside they become the single largest variable in the project.
What the Slope Creates
Slope percentage is more than a number on the grading plans. It determines what equipment can access the site, what foundation system is required, how much material needs to be moved, and how long the project takes. Two lots on the same street with similar square footage can have completely different construction costs based on slope alone.
At 15-20% slope, conventional equipment can typically reach the building pad, grading operations are manageable, and standard foundation systems may work depending on soil conditions. At 30-40% slope, equipment access becomes the primary constraint. You're cutting access roads into the hillside with excavators, working with skid steers and bobcats in tight conditions, and the foundation system almost certainly requires caissons or piles drilled to bedrock. Beyond 45% slope, the site development alone can exceed the cost of the house itself before any structure goes up.
An excavator can work on steep terrain and cut pathways where you need them, but access is tight and the logistics compound at every stage: material deliveries, concrete trucks, crane positioning, even where your workers park. The slope doesn't just affect the foundation. It affects every trade, every delivery, and every day of the schedule.
Geology and Soil Conditions
LA's hillside communities sit on a range of geological formations, and the subsurface conditions vary dramatically, sometimes within a single property. What's under the surface determines everything about the foundation, and you often don't know the full picture until you're in the ground.
The conditions that drive hillside construction decisions in Los Angeles generally fall into several categories:
- Bedrock (sandstone, shale, conglomerate): Generally provides good bearing capacity, but depth varies. Bedrock at 12 feet on one side of a property and 25 feet on the other is common. The difference between weathered rock (which may not meet bearing requirements) and competent bedrock is a distinction that matters enormously during construction and can only be confirmed by the geotechnical engineer in the field.
- Alluvium: Deposited material of variable quality. Can provide adequate bearing in some conditions but requires careful evaluation. Often interlayered with less competent material.
- Expansive clay: Soils with an Expansion Index above 50 require special foundation design to accommodate volume changes with moisture content. Common in many LA hillside areas and a frequent driver of post-tensioned or deepened foundation systems.
- Colluvium: Slope wash material: loose, unconsolidated, and generally unsuitable for bearing. Must typically be removed or bypassed with deep foundations.
Ancient Landslide Deposits
Portions of the LA hillside communities are built on ancient landslide deposits, ground that moved thousands or hundreds of thousands of years ago and has since been graded, landscaped, and developed as if it were stable native soil. It isn't. Ancient slide deposits are masses of disrupted, sheared material sitting on a pre-existing failure surface, and they can reactivate under the right conditions. Elevated groundwater, new loading from construction, removal of toe support during excavation, or seismic shaking can all trigger renewed movement on a slide surface that has been quiet for centuries.
The Palos Verdes Peninsula is the most prominent example. The Portuguese Bend landslide complex, a 240-acre ancient slide reactivated in 1956 by road construction and residential septic systems, has been moving continuously for nearly 70 years. Movement in the slide area peaked at roughly 12 to 14 inches per week in early 2025 and has since decelerated substantially through active dewatering, though gas and electric service remain suspended and FEMA has funded a $42M voluntary buyout program. The adjacent Big Rock Mesa slide in Malibu was triggered in 1983 by groundwater elevated from septic discharge and landscape irrigation on a 160-acre ancient slide deposit 350 feet thick. The litigation (*Hansch v. County of Los Angeles*) found the county liable for allowing septic systems on a marginally stable slope. The construction moratorium at Big Rock remains in effect today, and the factor of safety has never reached the code-required 1.5.
Building on ancient landslide deposits requires a level of investigation, design, and monitoring that goes well beyond standard hillside geotechnical work. Tieback systems, soil nails with whalers, and caisson systems anchored through the slide mass into stable material below are all potential approaches, but stabilizing an ancient landslide at the scale of a single residential lot is not always feasible. The geotechnical and engineering geology reports must address the global stability of the slide mass, not just the conditions at the building footprint. CGS (California Geological Survey) peer review is typically required. This is a due diligence issue that must be identified before property acquisition, not discovered during design.
The Artificial Fill Problem
This is one of the most significant and least discussed issues in LA hillside construction. Fill placed before 1963 is classified as "old fill" under the Los Angeles Municipal Code and is not certified under modern grading code requirements. Its composition is unknown, its compaction is unknown, and its depth is often unknown until you start digging.
Pre-1963 fill cannot be assumed to have any bearing capacity. When it's discovered, whether through geotechnical investigation or during excavation, the response is typically one of two paths: removal and recompaction (R&R), where the uncertified fill is excavated, processed, and placed back in controlled lifts with compaction testing and soils engineer observation; or deep foundations that bypass the fill entirely and bear on competent material below it. R&R typically reuses the excavated material on site unless the material is contaminated or otherwise unsuitable for recompaction, in which case it must be exported and replaced with certified import material. Where fill contains hazardous materials, additional handling and disposal requirements apply.
R&R on a hillside site is a fundamentally different operation than R&R on a flat lot. The excavated material has to go somewhere, which means trucks on narrow hillside streets, haul route approvals, and restricted hauling hours. Certified replacement fill (when required) has to come from somewhere, which means sourcing, testing, and importing material on those same constrained streets. Every lift of new fill requires compaction testing and soils engineer observation. And while the excavation is open, the surrounding slope needs to remain stable, which may require temporary shoring that wasn't in the original budget.
Groundwater
Hillside sites frequently have seasonal perched water tables, springs, and seeps that only become apparent when you cut into the slope. Water at the bottom of caisson holes during drilling is common and requires specific responses: casing the hole to prevent collapse, pumping to manage water levels, and switching to tremie pipe concrete placement with higher-PSI mix designs to ensure the concrete displaces the water properly and achieves full structural capacity.
None of this is unusual. It's a standard part of hillside foundation work. But it requires a drilling contractor who has dealt with it before, a soils engineer who can evaluate conditions in real time, and a construction manager who has planned for the possibility and has the right concrete mix and equipment staged. Planning for groundwater during pre-construction (staging the right concrete mix, coordinating casing, and scheduling the soils engineer) keeps the operation running when water is encountered.
The Geotechnical Investigation
A standard geotechnical investigation includes 3-4 borings, laboratory testing, and an engineering report with foundation and grading recommendations. On a flat lot, this is usually sufficient. On a hillside site, it often isn't, because soil conditions can change dramatically across short horizontal distances when there's significant elevation change between borings.
Three borings on a sloped lot may all be at different elevations, and each one only tells you what's happening at that specific point. Bedrock depth can change by 10 or more feet between borings that are 20 feet apart horizontally. If the foundation is designed based on three data points and the actual conditions between those points are materially different, the discovery happens during construction, when redesign, standby time, and revised foundation scope are all on the critical path. Additional borings during design are the most direct way to reduce that exposure.
During Design
for Geotech Reports in LA
Surveys and Site Documentation
Survey accuracy matters on every construction project, but on hillside sites the margin for error is even smaller and the consequences more severe. A 6-inch vertical error on any site creates problems, but on a hillside it can mean a grade beam doesn't reach the bedrock elevation it was designed to bear on, which triggers structural redesign in the field.
The NAVD88 datum reference is critical. Surveys, geotechnical boring logs, and structural plans all need to reference the same vertical datum. When they don't, when the surveyor uses one reference point and the geotech uses another, the result is foundation designs based on assumed elevations that don't match what the field crew encounters. This is a coordination issue that should be resolved before the first permit application, not discovered when the drill rig is on site.
Property line accuracy is also more consequential on hillside lots. Retaining walls, shoring systems, and tieback anchors approach or cross property boundaries more frequently on sloped sites than on flat ones. A boundary dispute that would be manageable on level ground can become a construction-stopping event on a hillside when your shoring system is 18 inches from the neighbor's property line.
The Regulatory Framework
Los Angeles has two primary regulatory layers governing hillside construction: the Baseline Hillside Ordinance (BHO) and the Hillside Construction Regulation (HCR) district. The BHO controls what you can build (size, height, grading quantities). The HCR controls how you can build it (working hours, hauling restrictions, operational constraints). Both must be understood before design begins, because they directly affect project scope, schedule, and cost. For general Los Angeles zoning context, see the dedicated guide.
Baseline Hillside Ordinance (BHO)
The BHO (Ordinance No. 181,624, effective May 9, 2011) establishes development standards for single-family homes on lots within the City's mapped Hillside Area, covering R1, RE, RS, and RA zones. It determines how much house you can build and how much earth you can move.
What the BHO regulates:
- Floor Area Ratio: Varies by zone and slope band. Steeper lots get less buildable area relative to lot size.
- Height limits: Vary by slope. Measured from existing or finished grade depending on conditions.
- Setback requirements: May be more restrictive than base zoning on hillside lots.
- Maximum Grading Quantities (MGQs): Vary by lot size and slope band. This is often the binding constraint. The ordinance limits how much dirt you can cut, fill, import, or export. See Grading Limits Los Angeles for the full breakdown.
- Import/export limits: Tighter for lots fronting substandard hillside limited streets. If your street frontage is less than 20 feet wide, your grading quantities are further restricted.
- Slope restrictions: New graded slopes cannot be steeper than 2:1 (horizontal to vertical). Grading on existing slopes of 100% or greater triggers additional review.
- Street access requirements: Minimum 20-foot wide roadway, dedication requirements along lot frontage, and Bureau of Engineering Hillside Referral Form process.
You can check whether your property falls within the BHO mapped Hillside Area using the City's ZIMAS or Interactive Web-Based Zoning Code platforms. A slope band analysis prepared by a licensed surveyor will be required as part of the permit application to determine your specific MGQ allowances.
Hillside Construction Regulation (HCR) District
The HCR (Ordinance No. 184,827, effective March 22, 2017) is a Supplemental Use District layered on top of the BHO. While the BHO governs what you can build, the HCR governs the operations of how you build it, and for projects in HCR areas, these operational restrictions are often the primary schedule driver.
Where the HCR applies:
- Bel Air - Beverly Crest Community Plan Area
- Bird Streets and Laurel Canyon
- Franklin Canyon, Coldwater Canyon, and Bowmont Hazen
- Northeast Los Angeles Community Plan Area
What the HCR restricts:
| Restriction | Requirement | Practical Impact |
|---|---|---|
| Maximum grading | 6,000 cubic yards cumulative per lot | May force foundation systems that minimize grading |
| Import/export (substandard streets) | 75% of by-right maximum | Further limits material movement on narrow streets |
| Construction hours | Mon-Fri: 8 AM - 6 PM Sat: interior work only, 8 AM - 6 PM No work Sundays/holidays |
10-hour days, 5.5 effective days per week maximum |
| Hauling hours | Mon-Fri: 9 AM - 3 PM only No hauling weekends or holidays |
6-hour daily window - the critical schedule constraint |
| Truck staging | Off-site, outside HCR district | Adds time to every truck round-trip |
| Haul route approval | Required for 1,000+ cubic yards of import/export | Public hearing before Board of Building and Safety Commissioners |
| Site Plan Review (now Project Review) | Required for houses over 17,500 SF | Additional discretionary review layer |
Multi-Agency Permitting
Hillside projects in Los Angeles don't go through a single permitting agency. They trigger review from multiple departments, each with their own requirements, timelines, and dependencies. Approval from one agency may be required before another will accept your application.
| Agency | What They Review | Hillside-Specific Issues |
|---|---|---|
| LADBS | Building & grading permits, structural plan check, geotech review | Grading permit separate from building permit; geotech approval can be iterative |
| LA City Planning | Zoning, BHO/HCR compliance, discretionary review | Slope band analysis, MGQ verification, HCR compliance |
| Bureau of Engineering | Street classification, dedication, sewer, drainage, haul route conditions | Hillside Referral Form, street adequacy, haul route approval process |
| LAFD | Fire apparatus access, water supply, hydrant distance | Minimum roadway width, turnaround requirements, maximum driveway slope, sprinkler requirements where access is compromised |
| LADOT | Traffic control for hauling operations | Haul route traffic studies, flagging requirements |
| Bureau of Street Services | Street use permits, repair bonds | Pre-construction street condition documentation, damage bonds for heavy hauling |
| LA Sanitation/Watershed | Stormwater compliance, BMPs | SWPPP required for larger grading operations; hillside erosion control more complex |
The critical path through these agencies is not linear, and dependencies between them can add months if not mapped in advance. A grading permit may require Bureau of Engineering clearance, which requires a haul route approval, which requires LADOT review, which requires a traffic study. Each step has its own timeline, and the sequence must be planned as carefully as the construction sequence itself. For detailed permitting information, see Los Angeles Permitting Overview.
Access and Logistics
Access is the constraint that shapes every other decision on a hillside project. The street width determines what trucks can reach the site. The driveway slope determines what equipment can get to the building pad. The available staging area determines how materials are delivered and stored. These aren't details that get figured out during construction. They determine the construction strategy before the first permit is pulled.
Street and Site Access
Many hillside streets in Los Angeles are 16-20 feet wide, barely two lanes and sometimes effectively one. This limits truck size for deliveries, concrete pours, and hauling operations. It affects crane mobilization, drill rig access, and even where construction workers can park without blocking the road. Overhead utility lines and low-hanging branches add vertical clearance constraints to the horizontal ones.
The access assessment isn't just about whether a vehicle can physically fit on the street. It's about whether it can get to the site, operate safely, and leave without shutting down the road for the neighborhood. On some hillside streets, a concrete truck backing into the property blocks both lanes for the duration of the pour. That reality must be planned for (traffic control, neighbor notification, and permits), not improvised on the day of.
Equipment Selection
On hillside sites, equipment selection is driven by access, not preference. The drill rig you'd use on a flat lot with 40 feet of clear access may not fit on a hillside site with a 12-foot-wide driveway and a 30% grade. The conventional crane you'd normally mobilize may not have adequate outrigger space on a sloped pad. The options narrow quickly, and each constraint affects cost and schedule.
Common equipment adaptations on hillside sites include:
- Excavators as the first machine on site: On steep sites, excavators work first to cut access roads, build drill pads, create benches for staging, and establish the paths that everything else depends on. An excavator can work on very steep terrain (effectively on a 1:1 slope) and can tow other equipment, including cranes, down steep slopes to locations that wheeled or tracked equipment can't reach independently. Skid steers and bobcats handle the tighter grading work once paths are established. Sometimes temporary shoring is required just to build access roads to necessary drill locations, which means the shoring contractor mobilizes before the drilling contractor can even reach the site.
- Limited-access drill rigs: Standard rotary drill rigs require relatively flat, stable ground. On constrained hillside sites, smaller limited-access rigs or even hand-drilling with cradalls and buckets may be the only option. Equipment capability vs. site constraints must be matched before bidding, not discovered when the rig arrives.
- Spider cranes: Where conventional cranes can't access or set up safely, spider cranes (compact, self-leveling cranes that can navigate tight spaces and operate on slopes) provide lifting capability at a premium cost. They're slower and have lower capacity than conventional cranes, which affects schedule and structural steel/form sequencing.
- Line pumps vs. boom pumps: When a concrete boom pump can't reach the pour location or can't set up on the available road width, line pumps with hundreds of feet of hose become the alternative. Longer pump lines mean slower pours and potentially more concrete truck staging time.
Crane Logistics on Hillside Sites
Crane operations on hillside sites are more complex than the crane pad itself. The pad must be wide enough for the crane to operate without ringers (stabilizing extensions), and both the ground above and below the crane pad must be stable enough to resist the concentrated loads without sloughing or settling. This can be a significant grading activity in its own right, sometimes requiring engineered fill, compaction testing, and temporary shoring of the downhill face before the crane can even mobilize.
Beyond the pad, crane selection is driven by reach requirements, site geometry, and street constraints. A mobile crane that needs to set up on a public road requires lane closure permits, traffic control, and often a street use permit from the Bureau of Street Services. On narrow hillside streets like those in the Bird Streets, upper Laurel Canyon, or parts of Pacific Palisades, the crane setup may block both lanes for the entire day. When the required reach exceeds what a mobile crane can achieve from the available setup position, a tower crane becomes the only option, but tower cranes require a foundation, a longer installation timeline, and their own permitting process. These decisions cascade through the entire project schedule and must be resolved during pre-construction.
Most hillside residential projects that require crane lifts need a prepared crane pad: a level, compacted surface with adequate bearing capacity for the crane's outriggers. This is not as simple as clearing a flat area. The crane pad must be engineered:
- Bearing capacity: The geotechnical engineer must confirm that the ground under the crane pad can support the concentrated outrigger loads. On fill or loose soil, this may require compaction, over-excavation and recompaction, or crane mats distributing the load across a larger area.
- Outrigger clearance: Full outrigger extension requires specific dimensions that may not be available on a narrow hillside pad. Partial outrigger configurations reduce lifting capacity, which affects what can be lifted and from what radius, directly impacting construction sequencing.
- Pad slope: Cranes have maximum operating slope tolerances (typically 1-2% for most mobile cranes). On a hillside site, achieving a level pad may require significant grading, and the crane pad excavation itself may need temporary shoring on the downhill side.
- Access and egress: The crane needs to get to the pad and leave when the lift is complete. On hillside sites with single-access driveways, the crane mobilization and demobilization sequence must be coordinated with all other site operations.
Grading and Earthwork
On a flat lot, grading is site preparation, a relatively predictable operation that happens before the real work begins. On a hillside, grading is the primary operation and typically the most expensive phase of the project, with the highest variability and the greatest likelihood that conditions discovered in the field will diverge from what was assumed during design.
Cut, Fill, and Export Operations
Hillside grading involves cutting into the slope to create building pads, access roads, and foundation excavations, and either filling or exporting the excavated material. The ideal scenario is balancing cut and fill on-site so nothing leaves the property, but this is rarely achievable on steep sites. Most hillside projects have a net export, which means hauling operations.
Export operations on hillside sites require haul route approval (mandatory for 1,000+ cubic yards under the HCR), truck sizing matched to street width and weight limits, spoils characterization (if uncertified fill is present, the material may require special handling or disposal), and coordination with the deputy inspector who must be on-site during hauling operations to count trucks and verify route compliance. Export quantities are determined by the approved civil plans, not estimated in the field.
Import operations (bringing certified fill onto the site for R&R or engineered fill placement) have the same logistical constraints in reverse, plus the additional requirement of material testing and certification before placement.
Removal and Recompaction (R&R)
When uncertified fill or inadequate bearing material is encountered, the typical response is removal and recompaction: excavate the unsuitable material, export what can't be reused, and place certified compacted fill in lifts with testing at each stage. On a hillside, R&R is complicated by limited staging area for excavated material, hauling constraints on narrow streets, the need for temporary shoring to maintain slope stability during excavation, and drainage management in the open excavation.
The soils engineer must observe and test every lift of replacement fill, typically at every 2 feet of placement. Nuclear density testing confirms compaction meets specifications. This is meticulous, sequential work that cannot be accelerated without compromising the foundation it supports.
Erosion Control and Stormwater
Open excavations on hillside sites are exposed to rain events in ways that flat lots are not. Water runs downhill: through your excavation, behind your shoring, into your neighbor's property, and onto the street below. A Stormwater Pollution Prevention Plan (SWPPP) is required for any construction project disturbing one acre or more of soil. The SWPPP must be prepared by a state-certified Qualified SWPPP Developer (QSD) and implemented by a Qualified SWPPP Practitioner (QSP) who conducts inspections and stormwater sampling during rain events. The property owner is the Legally Responsible Person and is ultimately liable for compliance. The SWPPP must be filed through the state's SMARTS system and approved before ground disturbance begins. Erosion control BMPs (staked swales, silt fencing, fiber rolls, inlet protection) must be in place before the rainy season. Penalties for non-compliance can reach $35,500 per day.
Seasonal constraints are real: starting a hillside grading operation in October that won't be stabilized before the rainy season is a risk decision with significant cost implications if a storm event hits an open excavation. Beyond the SWPPP, the City requires an annual erosion control plan stamped by the civil engineer and submitted before the rainy season (typically by October 1). The grading inspector must verify that erosion control measures are in place before any grading work can proceed each season. On projects under one acre, an Erosion Control Plan is still required as part of the grading permit, and the same practical obligation applies: exposed soil on a hillside must be protected before the rains come.
Drainage and Water Management
Water is the single most consequential variable on a hillside site. It drives slope failures, undermines retaining walls, erodes foundations, triggers neighbor disputes, and accounts for more construction failures than any structural inadequacy. Every hillside drainage system has one job: get water off the slope, away from structures, and into an approved discharge point without causing damage along the way. When drainage works, it's invisible. When it fails, the consequences are measured in hundreds of thousands of dollars and sometimes in lives.
Hillside drainage is not a single system. It's a hierarchy of devices, each designed to intercept, convey, or detain water at a specific point on the slope. The civil engineer designs this hierarchy as an integrated system based on the site's watershed, the upstream contributing area, and the 50-year isohyetal rainfall standard required by LAMC Section 91.7013. Every device must be sized by runoff calculations, and the system as a whole must convey water from the top of the slope to the street or storm drain without concentrating flow, increasing velocity beyond what the receiving surface can handle, or redirecting water onto a neighbor's property.
The Drainage Device Hierarchy
LAMC Section 91.7013 specifies the drainage devices required on hillside sites. These aren't optional, and each has specific dimensional and performance requirements:
- Interceptor terraces: Paved benches cut into the face of slopes at intervals not exceeding 25 vertical feet (where only one is required, at mid-height). Minimum 8 feet wide, with a longitudinal slope between 5% and 12%, always increasing in the direction of flow. A single run cannot exceed 150 feet to a downdrain. These intercept sheet flow running down the slope face and redirect it to controlled discharge points before it gains enough velocity and volume to erode the slope.
- Diverter terraces: Required at the top of all graded slopes where the tributary drainage area above exceeds 10% slope and 40 feet of horizontal projection. These prevent water from the hillside above from flowing over the cut face.
- Berms: Required at the top of all slopes. A simple earthen or paved ridge that prevents surface water from flowing over the slope edge.
- V-channels: Required behind any retaining wall or slough wall at the toe of a slope, to carry slope drainage to interceptors, downdrains, or other approved devices. This is the detail that prevents water from pooling behind a wall and building hydrostatic pressure.
- Downdrains: Convey concentrated flow down steep slopes without eroding them. Minimum 12-inch diameter pipe with paved inverts. Open channel downdrains must have 4x the capacity of the equivalent pipe size. At the outlet, energy dissipation is required: a paved apron or dissipator structure that slows the water velocity before it reaches the curb or storm drain inlet. Water moving fast enough to erode soil is moving too fast to discharge without control.
- Subdrains: Required under all fills placed in natural watercourses, along the flow line and any tributaries. Also required where active or potential springs or seeps will be covered by fill. Perforated pipe in drainage aggregate with filter fabric, discharging to an approved outlet.
- French drains: Perforated pipe (4-inch minimum, 6-inch on larger systems) in Class 2 permeable aggregate wrapped in geotextile filter fabric. Installed behind retaining walls, along foundation perimeters, and in any area where subsurface water needs to be intercepted and conveyed. Outlets must remain clear for the life of the system. Cleanouts at regular spacing allow maintenance access.
- Area drains and catch basins: Collect surface water at low points and route it to the closed storm drain system. Grate sizing must handle design storm flow. Sediment traps prevent debris from entering the conveyance system.
- Roof drainage conveyance: Downspouts cannot discharge onto slopes. Code requires all roof drainage to be collected and conveyed through subsurface piping to an approved discharge point. The full path from roof to street must be designed, not left to gravity and hope.
All pads with cut or fill must slope a minimum of 2% to an approved drainage device or to a public street (LAMC 91.7013.10). Drainage must be maintained during and subsequent to construction. The civil engineer provides professional inspection of drainage installation as part of the grading observation.
Stormwater Treatment and Cisterns
LA's Low Impact Development (LID) ordinance requires new construction and major renovations to capture and manage stormwater on site. On hillside properties, this typically involves a treatment and detention system sized based on the project's impervious area and the 85th percentile storm event.
The typical system chain on a hillside residential project works as follows: surface water is collected through area drains and roof drainage conveyance, routed through a CDS (Continuous Deflective Separation) unit that filters out leaves, debris, sediment, and hydrocarbons before the water enters the cistern. The CDS is a hydrodynamic separator that uses swirl concentration and indirect screening. It's the pretreatment device that keeps the cistern clean and the downstream system functional. Without it, the cistern fills with sediment and the overflow clogs. After the CDS, treated water enters the cistern for detention. The cistern has a metered outlet that slowly releases the captured volume after the storm, typically to the street or storm drain. Overflow from the cistern also routes to the street. The entire system requires Bureau of Engineering approval.
Cistern sizing depends on the impervious area created by the project and the capture volume required by the LID ordinance. On a hillside lot with 5,000 SF of roof, 2,000 SF of driveway, and 1,000 SF of hardscape, the capture volume calculation drives a cistern that can be substantial. Space is the constraint. Cisterns on hillside sites are typically installed below driveways, under landscape areas, or integrated into retaining wall systems. The structural implications of a cistern full of water on a slope must be accounted for in the structural and geotechnical design.
Why Water Destroys Hillsides
Understanding why drainage matters requires understanding how water interacts with soil on a slope. Water weighs 62.4 pounds per cubic foot. A 10-foot column of saturated soil behind a retaining wall exerts over 600 pounds per square foot of hydrostatic pressure at the base, a load the wall was not designed for if it was engineered for drained conditions. But the effect on slopes is more fundamental than pressure on walls.
What holds a slope together is effective stress: the friction between soil particles. When water fills the spaces between particles, it reduces that friction by exerting pore water pressure that pushes the particles apart. A slope that is stable when dry can fail when saturated, not primarily because the soil is heavier (it is, but that's secondary), but because the water pressure reduces the soil's shear strength. This is the mechanism behind nearly every slope failure in Los Angeles, from the Portuguese Bend landslide to the post-fire debris flows in the Palisades.
The soil types in LA's hillside communities make this worse. Clay soils are nearly impermeable, which means water percolating through fractured bedrock or sandy layers above a clay lens creates a perched water table, a saturated zone sitting on top of an impermeable layer rather than draining to the regional water table. Perched water builds pore pressure exactly where you don't want it: at the interface between soil layers, where slide surfaces form. LA's hillside geology (fractured sandstone and shale with clay-filled joints, colluvium over bedrock, alluvial deposits interlayered with clay) creates these conditions across most of the hillside communities.
Neighbor Liability and Surface Water Law
California follows a modified civil law rule for surface water, established by the California Supreme Court in Keys v. Romley (1966). The principle: a lower property owner must accept surface water that drains naturally onto their land, but the upper owner has no right to alter the natural drainage system so as to increase the burden. The modification adds a reasonableness standard: both the upper and lower landowner must act reasonably. The test is whether the alteration of drainage was reasonable under all circumstances.
Every hillside construction project alters drainage. Grading changes how water moves. Foundations and retaining walls redirect subsurface flow. New impervious surfaces (roof, driveway, hardscape) increase runoff volume and velocity. The civil engineer's drainage design is the legal defense against neighbor claims, and it is not optional. LAMC Section 91.7006.5 requires a notarized and recorded offsite drainage release covenant or easement from the adjacent property owner when construction changes or alters existing drainage patterns to adjacent property. Pre-construction documentation of existing drainage conditions (photographs, survey, video) creates a baseline that can be compared to post-construction conditions if a dispute arises. This is cheap insurance against expensive litigation.
Slope Stability and Landslides
Los Angeles has a documented history of slope failures stretching back over a century, with catastrophic events occurring in nearly every decade. The combination of steep terrain, variable geology, seasonal rainfall patterns, seismic activity, and increasing development on marginally stable slopes creates conditions that are unique in the United States. Understanding slope failure mechanics is not academic on a hillside project. It determines what can be built, what the foundation system must resist, and what the long-term risk to the property looks like.
How Hillsides Fail
Slope failures in Los Angeles fall into several categories, each with different triggers, speeds, and consequences:
- Rotational slides (slumps): The soil mass fails along a curved surface, rotating as it moves. The upper portion drops and tilts backward, creating a scarp at the top and a bulge at the toe. These are the most common type of deep-seated failure in LA's hillside communities and can move slowly over weeks or rapidly in minutes. Factor of safety analysis (the ratio of resisting forces to driving forces) uses a minimum of 1.5 for static conditions and 1.1 for seismic. When the factor drops below 1.0, the slope is actively failing.
- Translational slides: Failure along a planar surface, typically a weak layer such as a clay seam, bedding plane, or the interface between fill and native soil. These are harder to predict than rotational slides because the failure surface may not be intersected by geotechnical borings. The Altamira Shale beneath the Palos Verdes Peninsula, with its seaward-dipping weak layers, is the classic LA example of geology that produces translational slides.
- Debris flows: Fast-moving slurries of water, soil, rock, and vegetation that can travel faster than a person can run. Unlike landslides, which involve coherent soil masses, debris flows are fluid. They initiate when enough water saturates loose surface material on a steep slope, liquefying it into a flow. Post-fire conditions dramatically increase debris flow risk because burned hillsides develop hydrophobic soil, a waxy layer from vaporized plant oils that repels water rather than allowing infiltration. Half an inch of rain per hour on a burned slope is enough to trigger a debris flow.
- Soil creep: Slow, continuous downslope movement that happens over years. Not catastrophic, but cumulative. Manifests as tilted fences, cracked driveways, slow retaining wall displacement, and doors that progressively stick. Creep on an ancient landslide deposit is a warning sign that conditions are changing.
Historical Precedent: Why This Matters Now
The following events are not distant history. They are the documented evidence of what hillside geology, water, and human activity produce in Los Angeles, and they inform the risk assessment for every hillside project today.
- Bel Air Fire and aftermath (1961-1962): The November 1961 fire destroyed 484 homes across 6,090 acres of Bel Air and Brentwood, stripping vegetation from hillsides throughout the Santa Monica Mountains. The following winter storms triggered widespread slope failures across the fire-scarred terrain. This is the direct historical precedent for the current post-fire risk from the January 2025 Palisades fire, which burned 23,700 acres of the same mountain range.
- Portuguese Bend, Palos Verdes (1956-present): A 240-acre ancient landslide reactivated by road construction. Movement peaked around 12 to 14 inches per week in early 2025 and has since slowed substantially through active dewatering. Governor declared a state of emergency in September 2024. FEMA $42M buyout program launched. The stabilization approach: dewatering wells, surface drainage, and fissure sealing to prevent rainwater infiltration. For detailed coverage, see our Palos Verdes construction guide.
- Big Rock Mesa, Malibu (1983): A 160-acre ancient landslide triggered by elevated groundwater from septic systems, landscape irrigation, and rainfall. The county was found liable for allowing septic disposal on a marginally stable slope. Construction moratorium still in effect. Factor of safety has never reached the code-required 1.5.
- La Conchita (1995, 2005): Two events on the same bluff of poorly cemented marine sediments. The 2005 debris flow killed 10 people and destroyed 13 homes. The USGS concluded that "no part of the community can be considered safe from landslides." The 2005 failure occurred after 15 inches of rain in 15 days. The ranch above was found 50% negligent for inadequate drainage of its orchards.
- Montecito debris flows (January 2018): Three weeks after the Thomas Fire, 0.5 inches of rain fell in five minutes on burn-scarred slopes above Montecito. The resulting debris flows killed 23 people, destroyed over 100 homes, and damaged 400 more. Flows were 15 feet deep and moving at 20 mph. It is the deadliest post-fire debris flow event in modern California history and the clearest demonstration of the fire-to-flood sequence that now threatens the Palisades burn scar.
- Palisades post-fire debris flows (2025): Beginning weeks after the January 2025 Palisades fire, every significant storm has triggered debris flows across the burn scar. PCH closures near Big Rock Drive, mud on Topanga Canyon Boulevard, trapped vehicles on Mulholland, damage to Duke's restaurant in Malibu. The risk persists for 2-5 years until vegetation re-establishes. Flexible debris flow barriers (Geobrugg ring net systems anchored with micropiles) have been deployed on some residential properties to capture debris before it reaches structures.
Debris Flow Protection Systems
On larger residential properties situated below steep hillsides in mapped debris flow hazard areas, or on sites below burned slopes with sufficient space for the installation, flexible ring net barriers have become a viable protection option. These systems are not practical for every property. They require substantial channel width, adequate anchor zones in competent material, and ongoing maintenance access. On properties where they are feasible, systems manufactured by companies like Geobrugg use high-tensile steel wire nets supported by grouted rock anchors or soil nail micropiles. The nets can handle load capacities of 60 to 180 kN/m² and are designed to stop solid debris while allowing water to pass through, which increases the effective retention volume. Barrier heights up to 6 meters and spans up to 25 meters are achievable depending on channel geometry.
The foundation system for these barriers requires micropiles designed for the lateral impact loads of a debris flow event, which can be substantial. The anchors must be proof-tested before the barrier is tensioned. On residential projects, the cost ranges from $150,000 to over $500,000 depending on the span, height, foundation conditions, and access constraints. The barriers must be maintained: accumulated debris must be cleared after each event, and brake rings that have deformed under load must be inspected and potentially replaced. For detailed coverage of debris flow barriers in the context of foundation and geotechnical systems, see the dedicated guide.
What This Means for Construction
Slope stability is not just a design consideration. It affects construction operations directly. Open excavations change the force balance on a slope. Temporary shoring is designed to maintain stability during construction, but the design assumes specific drainage conditions that must be maintained throughout the work. A storm event that overwhelms temporary drainage and saturates the soil behind a shoring wall changes the loading condition the wall was designed for.
The construction manager's role in slope stability is maintaining the conditions that the engineer's design assumed: keeping drainage systems functional, monitoring for signs of movement (cracking, displacement, seepage), coordinating dewatering when groundwater is present, and having a response plan when conditions change. On hillside sites in mapped landslide hazard zones or on ancient slide deposits, the geotech may require monitoring instrumentation (inclinometers, survey points, piezometers) during and after construction. The cost of a monitoring program is modest compared to the cost of a slope failure during construction. This type of scope, where geotechnical investigation, structural engineering, drainage design, and construction execution must be coordinated around a defined stability problem, is what BCG structures as a focused engagement.
Shoring and Foundations
On most hillside sites, the foundation system and the temporary shoring required to build it are the two largest cost items in the project, and they're deeply interdependent. The shoring sequence determines the excavation sequence, which determines the foundation construction sequence, which determines the structural steel and framing sequence above. Getting the shoring and foundation strategy right during pre-construction has a direct effect on every phase that follows.
Why Shoring Is Almost Always Required
When you cut into a hillside, you remove the material that was holding the slope in place. The remaining soil above the cut needs to be retained to protect adjacent properties, to protect streets and utilities above the excavation, and to meet OSHA excavation safety requirements. Shoring systems used in residential hillside construction include:
- Soldier pile and lagging: H-piles driven or drilled at regular spacing with timber lagging between them. The most common system for moderate depths and loads. Relatively fast to install and adaptable to varying conditions.
- Soldier pile with tiebacks: Same as above, but with grouted anchors extending into the retained soil behind the wall to resist higher lateral loads. Required for deeper excavations or when the retained slope carries surcharge loads (a neighbor's house, a street, a retaining wall above).
- Soil nail walls: Steel bars drilled into the slope face and grouted in place, with shotcrete facing. Can be faster than soldier pile systems in certain soil conditions and offers some flexibility in geometry.
- Pipe and board: A temporary means-and-methods system for shallow, minor cuts in tight-access conditions where larger equipment can't operate. Pipe and board is not a code-compliant long-term shoring system and is used only for temporary construction access or minor excavation support.
Tieback easements are a recurring issue on hillside projects. When tiebacks extend under a neighbor's property (common when excavating near a property boundary on a slope) a temporary or permanent easement must be negotiated with the adjacent property owner. When the neighbor says no, the design team must find alternatives: cantilevered walls, buttress fills, or redesigned excavation limits. This is a real estate and legal coordination issue that the CM must track alongside the technical one.
Foundation Systems
Hillside foundations are fundamentally different from flat-lot foundations because they must resist lateral loads from the slope in addition to the vertical gravity loads of the structure. The hill is pushing on your foundation. The foundation must resist both downward forces and sliding forces, often in seismic conditions that compound the lateral load problem.
Caissons (drilled shafts) with grade beams are the workhorse of LA hillside construction. Caissons are drilled into bedrock for bearing capacity and lateral resistance, and grade beams span between them to carry the structure. This system works because it can reach competent bearing material at variable depths across the site. Each caisson goes as deep as it needs to, and the grade beams tie the system together structurally.
Other foundation systems used on hillside sites include soldier pile walls with structural grade beams, conventional footings where bearing soil is near the surface on relatively mild slopes, mat foundations (thickened slabs that distribute loads across a larger bearing area, which may or may not be post-tensioned depending on the soil conditions and structural loads), helical piers for tight-access conditions or supplemental support, and post-tensioned slabs on engineered pads with controlled fill. The system selection is driven by the geotechnical conditions and the structural loads.
Variable Bedrock: The Field Coordination Challenge
This is where hillside construction management separates from standard construction management. The geotechnical borings indicate bedrock at a certain depth. The structural engineer designs the foundation to bear at that depth. Then construction starts, and the actual bedrock is deeper, or shallower, or weathered rather than competent, or at a completely different elevation than the borings predicted 30 feet away.
When a grade beam is designed to bear on bedrock at one elevation and the field crew hits competent rock 3-4 feet lower, the grade beam needs to be deepened, which changes the rebar configuration, which changes the sliding force calculations, which may require additional pile resistance. The structural engineer and geotechnical engineer must coordinate a revised design while the drill rig is on site, rebar is being fabricated or delivered, and concrete is scheduled. Decisions that take weeks in design must be made in hours during construction.
The soils engineer must be on-site to observe and approve every caisson bottom before concrete is placed, confirming that the material at the bearing elevation is competent bedrock, not weathered rock or fill. This field verification is the moment where design assumptions meet reality, and the CM's role is to have the communication channels, the decision-making framework, and the schedule flexibility to handle whatever that moment reveals.
Drainage and Water Management
Drainage is covered in detail in the dedicated Drainage and Water Management section above. The key point for foundations: every hillside foundation system must be designed with drainage in mind. Subdrain systems behind retaining walls, foundation perimeter drains, and waterproofing systems for below-grade walls are not finishing details. They are structural protection systems that prevent hydrostatic pressure buildup, soil erosion at bearing surfaces, and long-term water damage to below-grade spaces. Downspouts cannot discharge onto slopes. All roof drainage must be collected and conveyed to approved discharge points.
For projects that include standalone retaining walls (whether new construction, repair, or replacement) see Retaining Walls for wall types, drainage systems, construction methods, and the specific coordination requirements that apply to retention structures.
Retaining Walls
Retaining walls on hillside sites serve a different function than decorative landscape walls on flat lots. For a standalone guide covering wall types, drainage, construction methods, and repair, see Retaining Walls Los Angeles. They're structural elements resisting thousands of pounds of lateral earth pressure, often supporting slopes that carry streets, utilities, or neighboring structures above them. The design, construction, and long-term performance of retaining walls is one of the most consequential decisions on any hillside project and one of the most common sources of failure when done incorrectly.
Types of Retaining Walls
Retaining wall selection depends on the height of retention, the soil conditions, the loads being retained (just soil, or soil plus a driveway, or soil plus a neighbor's house), available space for the wall footprint, and access for construction equipment. The main types used in Los Angeles hillside residential construction:
| Wall Type | How It Works | Typical Application | Height Range |
|---|---|---|---|
| Gravity walls | Mass of wall resists overturning. No steel reinforcement. Stone, concrete block, or mass concrete. | Low walls, landscape applications, minimal surcharge | Up to 4 feet |
| Cantilever walls | Reinforced concrete stem and footing. The weight of soil on the heel helps resist overturning. | Most common structural retaining wall. Moderate heights, adequate bearing soil. | 4-20 feet |
| Counterfort walls | Cantilever wall with vertical ribs (counterforts) on the backfill side for additional strength. | Taller walls where cantilever stem thickness becomes impractical | 15-30+ feet |
| Soldier pile walls | Steel H-piles drilled into bedrock with concrete or timber lagging between. May include tiebacks. | Deep cuts, poor bearing soil, temporary or permanent retention near property lines | 10-40+ feet |
| Soil nail walls | Steel bars drilled and grouted into existing slope face, with shotcrete facing. | Stabilizing existing slopes, cuts where conventional wall footings aren't feasible | 10-50+ feet |
| MSE walls (Mechanically Stabilized Earth) | Segmental facing units with geogrid reinforcement extending into compacted backfill. | Highway applications, large fills. Less common in residential due to space requirements. | 10-40+ feet |
| Caisson walls | Drilled shafts (caissons) with structural grade beam spanning between them. Often combined with soldier pile lagging above. | High loads, deep bedrock, combines foundation and retention functions | 15-40+ feet |
Retaining Walls Are Part of a Hillside Stability System
On hillside sites, a retaining wall is rarely an isolated element. Wall performance depends on global slope stability, groundwater behavior, surface drainage, utility corridors, and surcharges from adjacent improvements. A wall can be built exactly per plan and still experience distress if site conditions (water, loading, or soil behavior) differ from the assumptions used in design.
The distinction matters: wall failure is when the wall itself is inadequate for the loads it's retaining. Slope failure is when the hillside moves and takes the wall with it. A code-compliant wall on an unstable slope will still fail, and one wet winter can reset the groundwater regime and trigger movement that wasn't predicted by a geotech report done during a drought year.
Property Line Constraints and Tieback Realities
Many retaining walls over 10-12 feet require tiebacks or soil nails to resist overturning. On tight hillside lots, the anchor zone often extends beyond the wall footprint, which means it crosses property lines or conflicts with utilities. This is frequently the gating constraint that determines wall type, cost, and schedule.
- Tieback easements: If anchors extend under neighboring parcels, a recorded easement is typically required. Without rights, the design must change, often to a more expensive cantilevered or buttressed system that doesn't need anchors.
- Neighbor coordination: Getting easement rights requires neighbor cooperation. A neighbor who says no (or who wants compensation) can fundamentally change the project scope and budget.
- Utility conflicts: Existing and proposed utilities can block anchor alignments or limit drilling angles. Sewer lines, gas mains, and electrical conduits don't move for your tiebacks. Early potholing and utility mapping prevents redesigns mid-construction.
- Survey control: Walls near property lines require precise layout and monitoring to prevent encroachment. A wall that's 6 inches over the line is a legal problem, not just a construction problem.
What Retaining Walls Must Resist
Understanding the forces on a retaining wall explains why they're engineered structures, not just concrete in the ground. A retaining wall must resist:
- Lateral earth pressure: The horizontal force exerted by retained soil. Increases with wall height. Doubling the height more than doubles the overturning moment. Varies significantly based on soil type (clay vs. sand vs. rock) and moisture content.
- Surcharge loads: Additional loads on the retained soil surface: a driveway, a parked car, a swimming pool, an adjacent structure. Surcharge loads can double or triple the lateral force on the wall.
- Hydrostatic pressure: Water pressure behind the wall if drainage fails. Water weighs 62.4 pounds per cubic foot. A 10-foot wall with saturated backfill and no drainage has over 3,000 pounds per linear foot of additional lateral force that the wall wasn't designed for. This is why every retaining wall requires a functioning drainage system.
- Seismic loads: During an earthquake, lateral earth pressure increases significantly (the Mononobe-Okabe method is used to calculate seismic earth pressure in LA). California seismic design requirements are among the most stringent in the country.
- Sliding resistance: The wall must not slide forward on its footing. Dependent on friction between footing and bearing soil, plus any passive resistance from soil in front of the toe.
- Bearing capacity: The footing must not exceed the bearing capacity of the underlying soil, or the wall settles and rotates.
Drainage: The Most Critical Detail
In practice, more retaining walls fail from drainage problems than from structural inadequacy. When water accumulates behind a retaining wall, three things happen: hydrostatic pressure adds lateral load the wall wasn't designed for, saturated soil is heavier and exerts more pressure, and water migration can erode bearing soil under the footing. The wall that stood fine for 20 years fails after one wet winter because the drainage system clogged.
Proper retaining wall drainage includes:
- Drainage aggregate: Free-draining gravel (typically Class 2 permeable) behind the wall, minimum 12 inches wide, full height of wall.
- Filter fabric: Geotextile fabric separating drainage aggregate from retained soil to prevent fines migration and clogging.
- Perforated subdrain pipe (french drain): At the base of the drainage aggregate, sloped to outlet. Minimum 4-inch diameter, typically 6-inch on larger walls.
- Outlets: Subdrain must discharge to an approved location: storm drain, daylight to slope face below wall, or sump with pump. Outlets must remain clear and functional for the life of the wall.
- Weep holes: Secondary drainage through the wall face, typically 4-inch PVC at regular spacing, as backup if subdrain capacity is exceeded.
- Surface drainage: Swales, area drains, or other systems to prevent surface water from entering the backfill zone above the wall.
Shotcrete vs. Poured-in-Place Concrete
Most residential retaining walls in Los Angeles are built one of two ways: poured-in-place concrete using traditional formwork, or shotcrete (pneumatically applied concrete) sprayed against rebar and either the retained earth or a temporary form. The choice affects cost, schedule, finish options, and what geometries are feasible.
Shotcrete retaining walls eliminate or reduce formwork on the retained side. The concrete is sprayed directly against the excavated face or a simple backing, which typically saves 20-30% on labor and materials compared to fully formed poured walls of equivalent height. Shotcrete also handles curved walls easily. The nozzle follows any geometry, while curved formwork for poured concrete is expensive custom work.
The trade-offs with shotcrete include rebound (material that bounces off during application, typically 5-15% waste that must be removed from the site). Shotcrete also requires skilled nozzlemen; poor application technique creates voids, laminations, and inconsistent concrete quality. The exposed face requires finishing work after application: screeding to grade using piano wire guides, then floating or troweling to the specified texture.
Poured-in-place concrete is the conventional approach: build forms on both faces, place rebar, pour concrete, strip forms. It produces more precise dimensions, better control over wall thickness, and cleaner geometry at corners and terminations. For walls adjacent to habitable space or where water-tightness is critical, poured concrete typically performs better because the forming process produces denser, more consistent concrete.
| Factor | Shotcrete | Poured-in-Place |
|---|---|---|
| Cost | 20-30% lower | Baseline |
| Curved walls | Easy - nozzle follows any geometry | Expensive custom formwork |
| Finish quality | Requires post-application finishing | Form finish (smooth, board-form, etc.) |
| Dimensional precision | Variable - depends on nozzleman skill | Precise - controlled by formwork |
| Water-tightness | Good with proper application | Better - denser, more consistent |
| Waste | 5-15% rebound | Minimal |
| Best application | Utilitarian walls, soil nail facing, curved geometry, cost-sensitive projects | Architectural walls, adjacent to habitable space, board-form finish |
Finish and Architectural Integration
On residential projects, retaining walls are often visible: from the house, from outdoor living areas, from the street. The structural requirements don't change, but the finish and detailing become design decisions that affect both cost and the architect's intent.
Concrete finishes range from utilitarian to architectural:
- Gun finish (shotcrete): The natural texture from shotcrete application, rough and irregular, typically used where the wall will be covered or isn't visible. Lowest cost.
- Float finish: Shotcrete or poured concrete worked with a wood or magnesium float to a uniform but textured surface. Mid-range appearance, common for landscape walls.
- Steel trowel finish: Smooth, dense surface achieved by troweling. Works for both shotcrete and poured concrete, though easier to achieve consistency with formed walls.
- Board-form finish: Wood grain texture transferred from the formwork. Requires poured-in-place concrete with carefully selected and sealed form boards. High-end architectural finish with significant cost premium.
- Reveals and patterns: Horizontal or vertical grooves created by form inserts. Common on modern residential projects. Must be detailed on structural drawings and coordinated with rebar placement.
Veneer and cladding can transform a structural concrete wall into something else entirely: natural stone, manufactured stone, tile, stucco. The structural wall is designed the same way; the veneer is an architectural finish applied after the wall is built. Key considerations include anchorage (veneer systems require embedded anchors or adhesive systems rated for the weight and exposure), waterproofing behind the veneer (water that gets behind stone veneer and freezes will destroy it), and maintenance access (if the veneer fails in 20 years, can it be repaired without excavating the backfill?).
Guardrails and safety are code requirements when there's a drop on the other side of the wall. Walls over 30 inches high with accessible areas at the top require 42-inch guards. The guardrail attachment must be designed by the structural engineer: posts anchored into the wall cap or face, with connections that can resist the code-required loading. This isn't an afterthought; it's detailed during wall design.
Integrated elements that architects often incorporate into retaining walls include built-in planters (require waterproofing, drainage, and irrigation rough-in), lighting (conduit and junction boxes cast into the wall or surface-mounted after), seating (cap width and height designed for sitting), and water features (waterproofing, plumbing, and equipment access all coordinated before the wall is built).
Waterproofing and Buried Interface Details
Drainage relieves hydrostatic pressure, but waterproofing protects the wall and adjacent improvements from water migration. On residential projects where the wall is adjacent to habitable space, finish materials, or foundations, water intrusion through or around the wall causes damage that's expensive to remediate after the fact.
- Dampproofing vs. waterproofing: Not interchangeable. Dampproofing resists moisture vapor. Waterproofing resists liquid water under pressure. The specification depends on water exposure and adjacencies. A wall retaining soil next to a basement requires waterproofing, not just dampproofing.
- Protection board and drainage mat: Protects the membrane during backfill (angular aggregate can puncture membranes) and improves vertical drainage performance behind the wall.
- Cold joints and penetrations: The most common leak paths. Construction joints, keyways, weep hole sleeves, and utility penetrations are all weak points that require specific detailing: waterstops, sealants, or membrane boots depending on the system.
- Top-of-wall detailing: Cap flashing and surface drainage above the wall prevent water from entering the backfill zone from above. A wall with perfect subdrain but no cap control still gets water behind it every time it rains.
Construction Sequence
Retaining wall construction on hillside sites follows a specific sequence driven by safety and structural requirements:
Each inspection point is a potential hold if conditions don't match the design. Bearing soil that doesn't meet the assumed capacity requires footing redesign or ground improvement. Rebar placement that doesn't match the structural drawings requires correction before concrete. Drainage that isn't installed per plan requires removal and reinstallation before backfill.
Inspection and Test Plan
Retaining walls include critical buried conditions that cannot be verified after backfill. A disciplined inspection and test plan documents every element before it's concealed, confirming the work was built to the design intent and creating a permanent record of all concealed conditions.
Each hold point is documented with photos, test reports, and inspection records. This documentation serves two purposes: it confirms the work was done correctly during construction, and it provides evidence if questions arise years later about how the wall was built.
Permitting Requirements
Retaining walls over 4 feet in height (measured from bottom of footing to top of wall) require a building permit in the City of Los Angeles. What's included in the permit package:
- Structural drawings: Prepared by a licensed civil or structural engineer. Wall geometry, reinforcement, footing design, drainage details.
- Geotechnical report: Soil conditions, bearing capacity, lateral earth pressure coefficients, drainage recommendations. Must be project-specific, not a generic report from a prior owner.
- Grading plan: If wall construction involves more than 50 cubic yards of cut or fill, or if on a slope steeper than 5:1, a grading permit is required in addition to the building permit.
- Survey: Property boundaries, existing grades, proposed wall location. Critical when wall is near property lines.
Walls within Hillside Areas are subject to BHO grading limits. The excavation for the wall footing counts against your Maximum Grading Quantities. In HCR districts, hauling restrictions apply to any export from wall excavation. These regulatory constraints are the same as for any other hillside construction and must be factored into the project plan.
Common Failure Modes
Understanding how retaining walls fail helps understand why proper design, construction, and inspection matter:
- Wall rotates outward at the base
- Caused by lateral load exceeding design
- Often triggered by drainage failure or unanticipated surcharge
- Progressive - gets worse once it starts
- Wall moves horizontally at the footing
- Friction and passive resistance exceeded
- Can be sudden if bearing soil is saturated
- Common when key or shear key is omitted
- Footing sinks into inadequate soil
- Wall tilts and cracks as it settles unevenly
- Caused by bearing on fill, expansive clay, or soft material
- Should be prevented by geotech verification at excavation
- Wall stem cracks and breaks under bending
- Inadequate reinforcement for actual loads
- Corrosion of rebar due to inadequate cover
- Should never happen if designed and built to code
The first three failure modes (overturning, sliding, and bearing) are geotechnical failures that occur when actual conditions don't match design assumptions, or when conditions change after construction (drainage failure, new loads added). Stem failure is a structural failure from inadequate design or construction defects. All are preventable with proper engineering, construction quality control, and inspection.
Retaining Wall Repair and Remediation
Existing retaining walls that show signs of distress (cracking, tilting, bulging, settlement) require evaluation before any repair decision. The symptoms are visible; the cause is often not. A wall that's rotating outward could be failing due to drainage problems, new surcharge loads, bearing failure, or original design inadequacy. The repair approach depends on the cause. See also Structural Remediation for broader remediation methodology.
Common remediation approaches include:
- Drainage rehabilitation: If failure is drainage-related and the wall is structurally adequate, installing new drainage behind the wall (requires excavation) may stabilize it.
- Tieback installation: Drilling anchors through the existing wall into competent material behind to add resistance. Can be effective for overturning if bearing and stem are adequate.
- Underpinning: If bearing is inadequate, extending the footing depth or adding helical piers to reach competent material.
- Partial or complete replacement: When the wall is too far gone or the original design was fundamentally inadequate, demolition and reconstruction may be the only viable path.
Fire-Damaged Retaining Walls
Wildfires create unique damage patterns in concrete retaining walls that differ from normal aging or structural failure. After the Palisades and Eaton fires, thousands of homeowners are discovering retaining walls that look intact but may have suffered hidden damage that compromises their structural capacity and drainage systems. If the fire also affected the home's foundation, a separate foundation certification process applies.
How Fire Damages Concrete
Concrete doesn't burn, but it degrades significantly at high temperatures. The damage depends on how hot the fire burned and for how long:
- Surface discoloration (300-600°F): Concrete turns pink or red when heated above 500°F, a visible indicator that the material reached temperatures where strength loss begins. This discoloration is often the first sign of thermal damage.
- Strength reduction (600-1,200°F): Concrete loses 25-50% of its compressive strength in this range. The wall may look intact but no longer has the capacity it was designed for.
- Explosive spalling: Moisture trapped in concrete flashes to steam under intense heat, causing chunks of surface concrete to blow off. This exposes reinforcing steel and reduces the effective wall thickness.
- Rebar exposure and damage: Once cover concrete spalls off, rebar is exposed to direct flame and begins losing strength above 750°F. Exposed rebar also becomes vulnerable to corrosion, accelerating long-term deterioration.
- Thermal cracking: Rapid heating and cooling creates crack patterns different from settlement or overturning, often a network of fine cracks across the fire-exposed face.
Evaluation Process
Fire-damaged retaining walls require systematic evaluation before any repair-or-replace decision:
- Visual inspection: Document discoloration patterns, spalling, exposed rebar, cracking, and any displacement or tilting. Photograph everything before any cleanup or debris removal.
- Hammer sounding: Tap the wall surface with a hammer. Solid concrete sounds sharp; damaged concrete sounds hollow or dull. This helps map the extent of subsurface damage.
- Core sampling: If strength is in question, a testing lab can core the wall and test compressive strength of the damaged concrete versus the design strength.
- Drainage system assessment: This typically requires exploratory excavation behind the wall to inspect subdrain pipes, filter fabric, and drainage aggregate. Assume the drainage is compromised until proven otherwise.
- Structural engineer evaluation: A licensed structural engineer should assess whether the wall's remaining capacity is adequate for the loads it's retaining, especially if rebar is exposed or significant spalling has occurred.
Repair vs. Replacement
The repair-or-replace decision depends on the extent of damage and the cost-benefit of each approach:
- Damage is limited to surface discoloration and minor spalling
- Rebar remains covered or exposure is minimal
- Core tests confirm adequate residual strength
- Drainage system is intact or accessible for rehabilitation
- Wall geometry (plumb, alignment) is unchanged
- Extensive spalling with widespread rebar exposure
- Core tests show significant strength loss
- Wall has moved, tilted, or cracked through
- Drainage system is destroyed and wall access is difficult
- Repair cost approaches or exceeds replacement cost
Repair options for salvageable walls include surface preparation and patching with polymer-modified repair mortar, rebar treatment or supplemental reinforcement where steel is exposed, shotcrete overlay to restore section thickness and protect rebar, and drainage rehabilitation (excavation and new subdrain installation).
Insurance Documentation
Before any demolition, cleanup, or repair work begins, document everything for your insurance claim:
- Photographs: Overall wall condition, close-ups of damage (spalling, cracks, discoloration), any displacement or tilting, drainage outlets, and the relationship to the burned structure.
- Video walkthrough: Narrated video documenting the full extent of damage provides context that photos alone may not capture.
- Professional reports: Structural engineer assessment, geotechnical evaluation if slope stability is in question, and drainage system inspection report.
- Historical documentation: If available, original permits, engineering drawings, and any prior inspection reports establish what existed before the fire.
- Cost estimates: Get written estimates for both repair and replacement options from qualified contractors before making a claim decision.
Preconstruction Decisions That Reduce Cost and Risk
The biggest cost savings on retaining walls happen before construction starts, during design and preconstruction when decisions are still flexible. By the time you're pouring concrete, the expensive choices have already been made.
- Reduce wall height through grading: A few feet of grade adjustment can eliminate tiebacks, reduce stem thickness, and shrink footing size. Moving dirt is often cheaper than engineering around it.
- Terrace instead of one tall wall: Two 8-foot walls often outperform one 16-foot wall in cost, constructability, and drainage. Each wall is simpler, and the bench between them provides maintenance access and drainage control.
- Plan access before design is finalized: Drill rig access, spoils handling, and concrete placement strategy can dictate what's feasible. A wall that's elegant on paper but requires a spider crane and hand-placed concrete costs twice what a buildable design costs.
- Quantify earthwork early: Export, import, and trucking constraints are often bigger schedule drivers than the wall itself. In HCR districts, the hauling window may control your entire grading timeline.
- Confirm tieback rights before finalizing wall type: If you design a tieback wall and then discover the neighbor won't grant an easement, you're redesigning from scratch.
- Choose shotcrete vs. poured based on finish requirements: If the wall will be covered or isn't architecturally prominent, shotcrete can save 20-30%. If you need board-form finish, that decision drives the construction method.
Cost Considerations
Retaining wall costs vary dramatically based on wall type, height, length, site access, and soil conditions. General ranges for Los Angeles hillside residential:
| Wall Type | Cost Range (per linear foot) | Key Cost Drivers |
|---|---|---|
| Gravity/landscape walls (under 4') | $150-400 | Materials, site access, finish treatment |
| Cantilever walls (4-10') | $400-800 | Height, bearing conditions, reinforcement, drainage |
| Cantilever walls (10-20') | $800-1,500 | Footing size, form complexity, equipment access |
| Shotcrete walls (any height) | 20-30% less than formed equivalent | Nozzleman skill, rebound disposal, finish requirements |
| Soldier pile walls | $1,000-2,500 | Pile depth, spacing, tieback requirements, lagging type |
| Soldier pile with tiebacks | $1,500-3,500 | Number of tieback rows, anchor length, easement requirements |
| Caisson walls | $2,000-5,000+ | Caisson depth, diameter, grade beam complexity |
These are construction costs only. Add engineering (typically $15K-50K for structural and geotech on significant walls), permitting, and inspection. Site access constraints can add 30-50% to construction costs on hillside sites where equipment mobilization is difficult.
The construction manager's coordination role on retaining wall projects is covered in the Construction Manager's Role section. The critical retaining wall-specific detail: drainage and waterproofing are inspected and documented before backfill as a standard hold point.
The Cost and Schedule Reality
The question architects and homeowners ask most frequently about hillside construction is "how much more does it cost?" The answer is that hillside sites don't carry a simple percentage premium over flat-lot construction. The premium is concentrated in specific categories, and understanding where the money goes is essential to setting realistic budgets and making informed design decisions. The Owner's Guide to High-End Residential Construction covers the broader budgeting and team assembly process; this section focuses specifically on hillside cost and schedule drivers.
What Drives Hillside Construction Cost
| Cost Category | What It Includes | Typical Premium Over Flat-Lot |
|---|---|---|
| Site access and logistics | Equipment mobilization constraints, spider cranes, limited-access rigs, material delivery coordination, constrained staging | 2-5x equipment costs |
| Geotechnical and foundations | Additional borings, caissons/piles to bedrock (30-60+ feet vs. 3-foot spread footings), grade beams, soils engineer observation at every bearing point | 5-15x foundation costs |
| Shoring and retention | Soldier piles, tiebacks, retaining walls, subdrain systems, tieback easement coordination | Often $200K-$1M+ (may not exist on flat lot) |
| Grading and earthwork | Cut/fill operations, export hauling, R&R if uncertified fill is discovered, haul route compliance, deputy inspector | 3-10x per cubic yard |
| Coordination | More consultants (geotech, structural, civil, shoring designer), more inspections, more plan check cycles, more agency coordination | 2-3x soft costs |
| Risk/contingency | Higher probability of field conditions diverging from design, weather sensitivity, neighbor issues | 15-25% contingency vs. 10% on flat lot |
Flat Lot, Westside
Hillside Lot*
*Range varies significantly based on site access, foundation complexity, and finish level. High-end finishes can push costs higher.
The premium is almost entirely in site work, foundations, and the coordination required to manage the complexity. The house itself (framing, mechanical/electrical/plumbing, finishes) costs roughly the same whether it sits on a flat lot or a hillside. Everything below the first floor drives the differential. This is why a single blended cost per square foot is only a starting point on a hillside. The honest way to read a hillside budget is two numbers: a fully-burdened cost per square foot for the building, reported on a Gross Building Area basis (the garage and enclosed structure included), plus the site and hillside scope carried as a separate cost center that does not scale with house size. The blended figures above fold those two together, which is why the range is so wide.
Schedule Reality
| Phase | Hillside | Flat Lot |
|---|---|---|
| Permitting | 6-18 months | 3-6 months |
| Site development | 4-12 months | 1-3 months |
| Structure and finishes | 12-18 months | 10-14 months |
| Total project | 18-36+ months | 12-18 months |
The schedule difference is concentrated in permitting and site development. Multi-agency permitting with dependencies, restricted grading and hauling windows, complex foundation systems requiring field verification, and the sequential nature of hillside construction (shoring must be complete before foundation, foundation before structure, and there's less ability to overlap phases than on flat sites) all extend the timeline.
Extended schedule has a direct cost impact beyond the obvious. Every additional month is another month of general conditions (supervision, insurance, temporary facilities, equipment rental), another month of exposure to weather events, and another month of opportunity for field conditions to change. This is the schedule-cost spiral, and it's why pre-construction planning matters more on hillside sites than anywhere else. See Feasibility Report for how this planning is structured.
The Construction Manager's Role on Hillside Projects
The construction manager's role on a hillside project is fundamentally different from its role on a flat-lot build, not in kind but in intensity. Every function a CM performs on any project (constructability review, budget development, subcontractor coordination, schedule management, field oversight) is amplified by the complexity of hillside conditions. The margin for error is smaller, the decision-making pace is faster, and the coordination between disciplines is more intensive.
Pre-Construction
Pre-construction on a hillside project is where the CM delivers the most value relative to cost. This phase includes:
- Geotechnical scope review: Evaluating whether the investigation scope matches the site complexity, and recommending additional borings when the construction risk of insufficient data exceeds the investigation cost.
- Constructability review: Reviewing structural and civil plans for buildability: can the designed foundation actually be constructed with available equipment on this site? Are the assumed bearing elevations realistic given the geotech data? Does the grading plan comply with BHO/HCR limits?
- Equipment access and logistics planning: Determining what equipment fits the site, planning crane pad requirements, identifying staging areas, and developing the delivery coordination strategy.
- Shoring and excavation sequence: Working with the shoring designer to develop a sequence that maintains slope stability while creating efficient access for foundation construction.
- Budget development with hillside-specific categories: Building cost estimates that account for access premiums, foundation complexity, grading constraints, extended schedule, and appropriate contingency for field condition risk.
- Agency coordination and permit strategy: Mapping the multi-agency permitting path, identifying dependencies, and enabling parallel processing where possible.
- Subcontractor prequalification: Identifying drilling contractors, grading contractors, and shoring contractors who have experience on hillside residential sites in Los Angeles, not just licensed but experienced with the specific constraints these projects present.
During Construction
During construction, the CM's role shifts to real-time coordination and decision management. On a hillside project, this means:
- Field verification at critical milestones: Being present when caissons reach bearing, when shoring is loaded, when excavations expose actual soil conditions. These are the moments when design assumptions are confirmed or revised.
- Soils engineer coordination: Managing the schedule interface between the soils engineer's observation requirements and the construction sequence. On a hillside foundation, the soils engineer may need to approve 20+ individual caisson bottoms, each one a potential hold point if conditions don't match the design.
- Real-time communication: Maintaining open channels between the structural engineer, geotechnical engineer, and field crew so that when conditions diverge from design, the information reaches the right people immediately and decisions are made with complete information.
- Decision framework when conditions don't match design: Document the condition, notify the design team with clear information, propose constructable solutions, get direction before proceeding, and track cost and schedule impact. This cycle may repeat multiple times per week on a complex hillside foundation.
For information on how BCG approaches hillside construction on residential projects in Los Angeles, including shoring coordination, deep foundation sequencing, crane logistics, and multi-agency permitting, see our Hillside Home Builder page.
For information on how BCG handles retaining wall projects, slope stabilization, and structural remediation on hillside properties, including investigation, engineering coordination, and construction execution, see our Structural Remediation Contractor page.
FREQUENTLY ASKED QUESTIONS
Symptoms and Site Conditions
Cost and Budget
Regulatory and Permitting
Foundations and Structure
Drainage and Water Management
Timeline and Process
Equipment and Logistics
Who to Hire
Retaining Walls in Los Angeles →
Shoring & Underpinning in Los Angeles →
Grading Limits in Los Angeles →
Structural Remediation in Los Angeles →
Lot Due Diligence in Los Angeles →
Los Angeles Permitting Overview →
Construction Costs in Los Angeles →
Construction Timeline in Los Angeles →
Budget & Cost Control →
Feasibility Report →
Fire Rebuild Los Angeles →
PGRAZ Fire Rebuilds →
Fire-Damaged Foundation Certification →
Palos Verdes Residential Construction →
Coastal Construction in Malibu →
Construction Insurance in Los Angeles →
Building Envelope & Waterproofing →
Why CMAR: With vs. Without a Construction Manager →
The Owner's Guide to High-End Residential Construction →
Focused Engagement Options →
If you're dealing with a hillside problem (slope movement, retaining wall failure, drainage issues, foundation concerns) or planning construction on a hillside site in Los Angeles, BCG can help define the scope and manage the work.
This page provides general information about hillside construction in Los Angeles and is not intended as geotechnical, structural, or legal advice. Specific projects require evaluation by licensed professionals. Regulatory information reflects conditions as of July 2026; ordinances and requirements are subject to change. Consult LADBS and LA City Planning for current requirements applicable to your property.